It took a few attempts to get a compatible Python and OpenCV library running under Visual Studio Code on macOS Catalina using a virtual environment. I made a video to show how I got this going – this post just adds some more details.
There is also an excellent tutorial from Microsoft:
Visual Studio Code running on a virtual machine may have problems rendering the interface. This seems to be related to the underlying Electron framework and GPU acceleration. I made a quick video to show how I got around this:
Fix rendering problems for Visual Studio Code running on a virtual machine
Install Python 3.7.5
A virgin Mac comes with Python 2.7 installed – this is not recommended and V3.7.5 works with OpenCV4 on a Mac. V3.8 does not work at the time of writing (although since I started writing this post it looks like it now does). Download the installer from the main python website by selecting Downloads, Mac OS X, and then selecting the 64-bit installer:
Run the installer – I used all default settings.
Install Visual Studio Code
Download the installer from Visual Studio Code and immediately move the downloaded file to the Applications folder. (This is the actual application, not an installer). Try to run once – macOS will refuse due to security:
Close the message, open System Preferences, and select the Security and Privacy settings. Then select “Open Anyway” to allow VSC.
Visual Studio Code should now start:
Configure Python
Open a folder by selecting Open folder and then add a new file. Save the file using the .py extension:
Visual Studio Code immediately offers to install the Python extension, select Install:
On a virgin Mac there will now be a prompt to install command line developer tools, so click Install if prompted and allow the installation to complete before returning to Visual Studio Code.
The status bar will show the selected interpret if everything has gone well:
Install the linter (pylint): this helps analyse the code for bugs and style issues. It also might not work first time but we can fix shortly…
If the terminal window suggests upgrading pip, the Python package manager, then go for it by running the following in the terminal window:
python3 -m pip install --upgrade pip
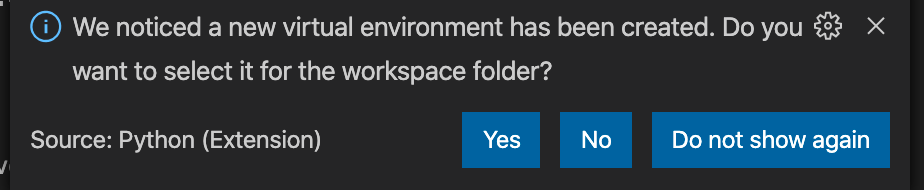
Make a virtual environment
A virtual environment is a self-contained directory tree that contains a Python installation for a particular version of Python
opencv-utils (0.0.2) – OpenCV Utilities ctypes-opencv (0.8.0) – ctypes-opencv – A Python wrapper for OpenCV using ctypes opencv-wrapper (0.2.3) – A Python wrapper for OpenCV. opencv-cython (0.4) – An alternative OpenCV wrapper dajngo-opencv (0.3) – Django Opencv integratio opencv-python (4.1.2.30) – Wrapper package for OpenCV python bindings
For this test I’m using opencv-python. The details on version 4.1.2.30 can be found on the Python Package Index site. Interestingly this version was only released a few hours ago and says it supports Python 3.8 😬 I guess I’ll try this on a virtual machine first to check it’s all ok!
Install OpenCV using pip:
python3 -m pip install opencv-python
Write some code and fix the linter
First test: import the OpenCV module and print the library version.
import cv2
print('Using OpenCV version {0}'.format(cv2.__version__))
After running this output is shown in the terminal:
But – there’s a problem. In the editor the linter is suggesting that cv2 is not a known module:
This has been seen before on the pylint GitHub issues page. For me, the solution is to edit the .vscode settings. Using ⇧⌘E (shift+command+E) to view the explorer page, expand the .vscode file and click settings.json:
Add a comma to the end of the line of the existing setting, then add the following new setting:
I’ve started working with Python (2.7 and 3.x) and OpenCV 3 recently, and the IPython Notebook way of working with inline plots is awesome. But the debugging, editing and some other features are not great when compared to working in a Visual Studio environment.
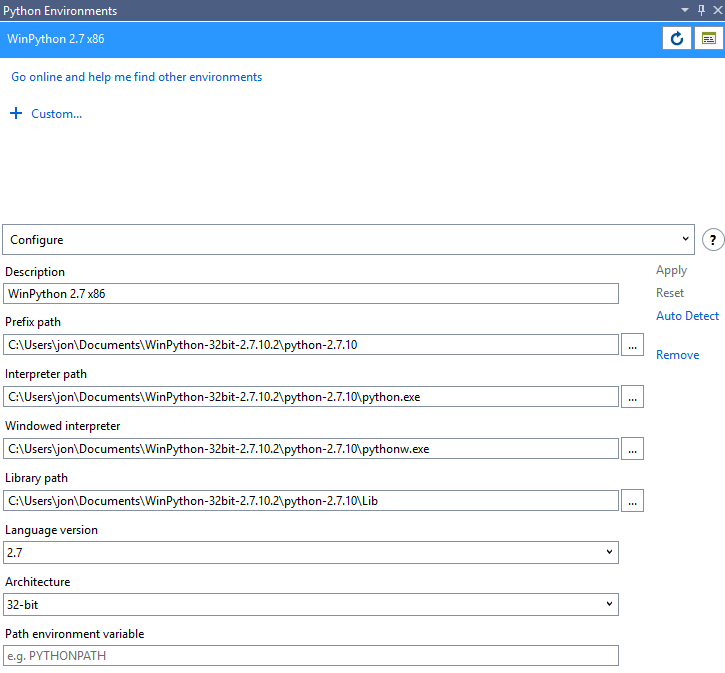
So now I’m trying Visual Studio 2013 as the IDE, OpenCV 3, and Python 2.7 via the numerical and scientific WinPython stack.
I extracted OpenCV and WinPython to:
My Documents\OpenCV
My Documents\WinPython-32bit-2.7.10.2
From VS2013 I then installed Python Tools for Visual Studio (PTVS).. I did this within VS2013 using the Extensions and Tools dialog.
Finally I configured a new Python Environment:
From an Interactive Window I can then check everything works as expected. First, Open CV3:
Python interactive window. Type $help for a list of commands.
import cv2
cv2.__version__
'3.0.0'
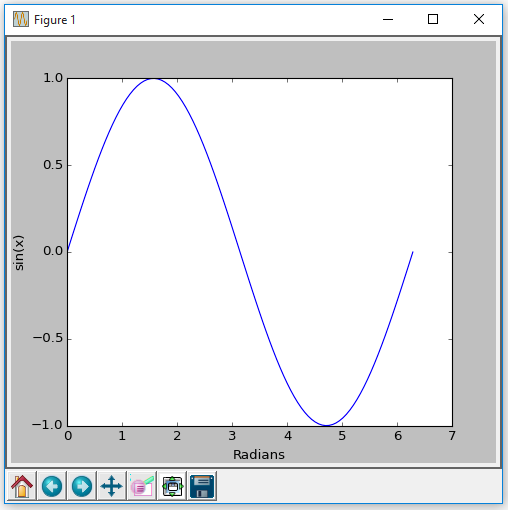
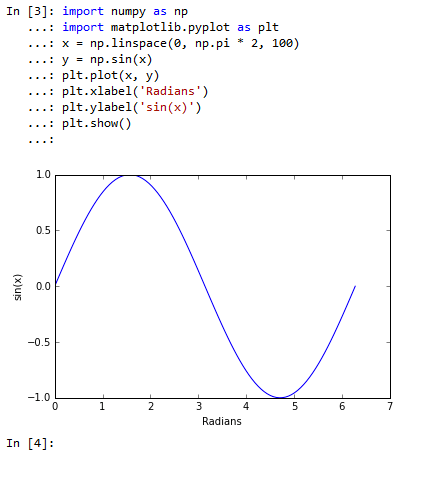
Next up, NumPy and a MatPlotLib chart:
import numpy as np
import matplotlib.pyplot as plt
x = np.linspace(0, np.pi * 2, 100)
y = np.sin(x)
plt.plot(x, y)
plt.xlabel('Radians')
plt.ylabel('sin(x)')
plt.show()
This gives us a popup (model) window:
Now to make it a bit more interesting – inline plots.. ! The Python Interactive Window has options for the Interactive mode:
The default Interactive Mode is Standard but we can change this to IPython:
After restarting VS2013 we can now go inline…
And lastly an OpenCV 3 test:
In [4]: import cv2
In [5]: img = cv2.imread(r"C:\Users\jon\Pictures\Samples\eye.jpg", 0)
In [6]: plt.imshow(img, cmap='gray')
Out[6]: <matplotlib.image.AxesImage at 0x5b8e510>
In [34]: blur = cv2.medianBlur(img, 91)
In [35]: plt.imshow(blur, cmap='hot')
Out[35]: <matplotlib.image.AxesImage at 0x1edea7d0>
The great thing is I can now move this code into a Python project, get it into git, distribute among colleagues, and use the excellent intellisense and debugging powers of PTVS ! (Obviously not this actual code !)
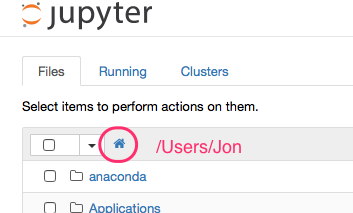
Anaconda, running on El Capitan, only provides access to files and folders under the current user’s home directory.
My Dropbox folder lives on an external drive and therefore isn’t accessible from the folder list. (I actually use a slimline 128 GB JetDrive card from Transcend.. fast enough for my 100+ GB of Dropbox files).
The solution was to create a symbolic link in my Documents folder which referenced the external Dropbox folder.
$ ln -s /Volumes/SDCARD/Dropbox ~/Documents/DB
From Anaconda’s perspective this looks like any other folder:
Yesterday I tried to get Eclipse and PyDev installed on my MacBook Pro (running Mavericks). After a couple of hours of struggling I gave up and discovered LiClipse which is a highly recommended system for working with Python and many other languages from the Eclipse framework.
I used a clean OS X Mavericks virtual machine to get my installation nailed down, especially important since I wanted to work with Python 3.x.
LiClipse: click the Google Drive link, select the latest version (currently 0.9.6), click and download the OS X file (currently liclipse_0.9.6_macosx.cocoa.x86_64.dmg), then install using all default options.
Configuration
Eject all download package (DMG) folders on the desktop.
Use Finder and go to Applications, open the liclipse folder, then drag the LiClipse app to the dock.
Run LiClipse. If a software update prompt appears for Java SE 6 then install it.
Accept all defaults when starting for the first time and restart the app.
Select File / New project, then select PyDev/PyDev Project:
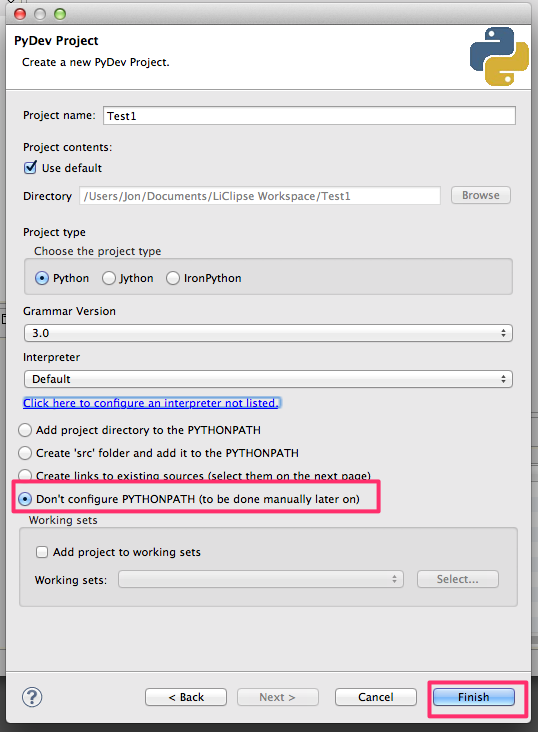
Hit Next, then set a project name and click the link to configure an interpreter:
Select the advanced configuration option:
Then select python3.3:
On the next screen make sure all folders are selected:
Back on the new project screen make any other changes – I opted not to configure the Python path – then click Finish:
The Open Associated Perspective prompt may appear – I chose to associate the project with the PyDev perspective:
These Python and perspective settings will be used the next time LiClipse is started for Python projects.
Quick Python test
Following on from the above new I added a new Python file, entered a couple of lines of code, and ran it:
Debugging
If the debugger is used, for example by stepping through the code, there’ll be an option to switch to another perspective – this should be used for debugging:
This presents more window areas for examining variables, viewing the editor and console output, etc:
After the debugging session is complete the Debug perspective will still be active. To switch back to the original perspective use the menus:
Window | Open Perspective | Other, then select PyDev.
I use a Raspberry Pi to host SVN and Git repositories but don’t have a static IP with my BT Infinity account. To support remote connectivity I use a dynamic DNS service from Dyn.
The only feature missing was the ability to detect when the IP address had changed, and then to automatically update it.
So with a bit lot of Googling I’ve put together a Python 3 script which is run hourly via crontab. The script uses Dyn’s IP address utility to find the current IP address. This is compared to the last known IP address which I store in a text file. If the address has changed then Dyn’s Perform Update utility is used to sent the new IP address. Any changes or errors are emailed back to me.
Here’s the script:
#!/usr/bin/env python3

import re
import urllib.request
import os
import sys
import smtplib

# -----------------------------------------------------------------------------
# variable: lastIPAddressFileName
#
# The name of a file used to store the last committed IP address.
# -----------------------------------------------------------------------------
lastIPAddressFileName = '/var/tmp/last_router_ip'

# -----------------------------------------------------------------------------
# function: mailInfo
#
# Emails a message to one or more recipients. This should just be used for
# errors and successful changes of IP. (I.e. not used for regular no-change
# messages).
# -----------------------------------------------------------------------------
def mailInfo(info):
	#print('Sending email [{0}]'.format(info))
	from email.mime.text import MIMEText

	msg = MIMEText(
	"Hello from the Raspberry Pi DNS IP update utility.\n"
	"I have a new message for you:\n\n{0}".format(info))

	msg['Subject'] = 'CDS.RPi DSN IP Utility'
	msg['From'] = 'CDS RPi'
	msg['To'] = 'jon@carpediemsystems.co.uk'

	s = smtplib.SMTP('smtp.gmail.com', 587)
	s.ehlo()
	s.starttls()
	s.ehlo()
	s.login('jon@carpediemsystems.co.uk', '******')
	s.sendmail('jon@carpediemsystems.co.uk', ['jon@carpediemsystems.co.uk'], msg.as_string())
	s.quit()

# -----------------------------------------------------------------------------
# function: findRouterIP
#
# Returns the IP of the router by scraping the results of the DYN DNS check
# IP web site. None is returned if the address cannot be found.
# -----------------------------------------------------------------------------
def findRouterIP():

	ipAddress = None
	webAddress = 'http://checkip.dyndns.org/'
	siteData = urllib.request.urlopen(url = webAddress).read()
	siteAsText = str(siteData)
	ipAddresses = re.findall('\d{1,3}.\d{1,3}.\d{1,3}.\d{1,3}', siteAsText)

	if(len(ipAddresses) == 1):
		ipAddress = ipAddresses[0]

	return ipAddress

# -----------------------------------------------------------------------------
# function: dynDnsPerformUpdate
#
# Updates the IP address of a DynDNS host using Dyn's Perform Update request.
# The resulting web page is scraped and the function will return True if one
# of the valid results codes is seen (meaning the IP address was either updated
# or was not changed).
# -----------------------------------------------------------------------------
def dynDnsPerformUpdate(username, password, hostname, ipAddress):

	url = 'http://{0}:{1}@members.dyndns.org/nic/update?hostname={2}&myip={3}&wildcard=NOCHG&mx=NOCHG&backmx=NOCHG'.format(username, password, hostname, ipAddress)
	fancyOpener = urllib.request.FancyURLopener()
	siteData = fancyOpener.open(url).read()
	siteAsText = str(siteData)

	acceptableResults = ['good', 'nochg']
	isOk = len([r for r in acceptableResults if r in siteAsText]) > 0
	return isOk

# -----------------------------------------------------------------------------
# function: checkForNewIPAddress
#
# Finds the current router IP address and compares it to the last address
# saved to the lastIPAddressFileName file (if it exists).
#
# Returns a tuple:
#	Current IP address (string)
#	Is this a new and valid IP address (boolean)
# -----------------------------------------------------------------------------
def checkForNewIPAddress():
	lastIPAddress = None

	if(os.path.exists(lastIPAddressFileName) == True):
		with open(lastIPAddressFileName, 'r') as f:
			lastIPAddress = f.read()

	currentIPAddress = findRouterIP()
	isNewIPAddress = ((currentIPAddress != None) and (currentIPAddress != lastIPAddress))

	return currentIPAddress, isNewIPAddress

# -----------------------------------------------------------------------------
# function: saveNewIPAddress
#
# Sends the new IP address to Dyn DNS. This is also saved to the
# lastIPAddressFileName file if the web operation succeeded.
#
# Returns True if the operation succeeded.
# -----------------------------------------------------------------------------
def saveNewIPAddress(newIPAddress):
	username = '******'
	password = '******'
	host = '******.dnsalias.net'
	didUpdate = dynDnsPerformUpdate(username = username, password = password, hostname = host, ipAddress = newIPAddress)

	if(didUpdate == True):
		with open(lastIPAddressFileName, 'w') as f:
			f.write(newIPAddress)

	return didUpdate

# -----------------------------------------------------------------------------
# Script main
# -----------------------------------------------------------------------------

try:
	currentIPAddress, isNewIPAddress = checkForNewIPAddress()

	if(currentIPAddress == None):
		mailInfo('ERROR: failed to get current IP address')
	elif(isNewIPAddress == False):
		print('IP address is unchanged - nothing to do')
	else:
		saveNewIPAddress(currentIPAddress)
		mailInfo('IP address updated to {0}'.format(currentIPAddress))
except:
   mailInfo("ERROR: An unexpected error was detected in the script:", sys.exc_info()[0])
Note: the scripting presentation in this post was done by using WordPress.com’s sourcecode widget, as described here.
The script was saved to:
/bin/DNS_IP_Util.py
and made executable with:
sudo chmod +x DNS_IP_Util.py
It was scheduled to run hourly by editing root’s cron file. The command to run the editor is:
sudo crontab -e
The cron file was edited to include the following two lines:
# DNS update, every day, hourly
0 * * * * /bin/DNS_IP_Util.py &