
The Geekom A9 Max ships with a single NVMe drive – mine came with 1TB from Amazon (current listings show 2TB, so this may vary by batch). Either way, there’s a vacant M.2 2230 slot. I added a Crucial P310 2TB M.2 2230 NVMe PCIe Gen 4.
| Primary slot | M.2 2280 (PCIe 4.0) |
| Secondary slot | M.2 2230 (PCIe 4.0) |
| Max capacity per slot | 4TB |
| SSD used in this guide | Crucial P310 2TB M.2 2230 NVMe PCIe Gen 4 |
The secondary slot requires a 2230 form factor drive – 22mm wide and 30mm long. A standard 2280 will not fit. Double-check the size printed on the drive before ordering.
What you’ll need
- Crucial P310 2TB M.2 2230 NVMe PCIe Gen 4 – confirmed working in the Geekom A9 Max
- Phillips #0 screwdriver
- Plastic pry tool (to lift rubber feet without damage)
- Anti-static wrist strap (recommended)
Step-by-step installation
Step 1: Shut down and disconnect everything
Fully power off – not sleep or hibernate. Unplug the power cable, then hold the power button for five seconds to drain residual charge. Disconnect all peripherals.
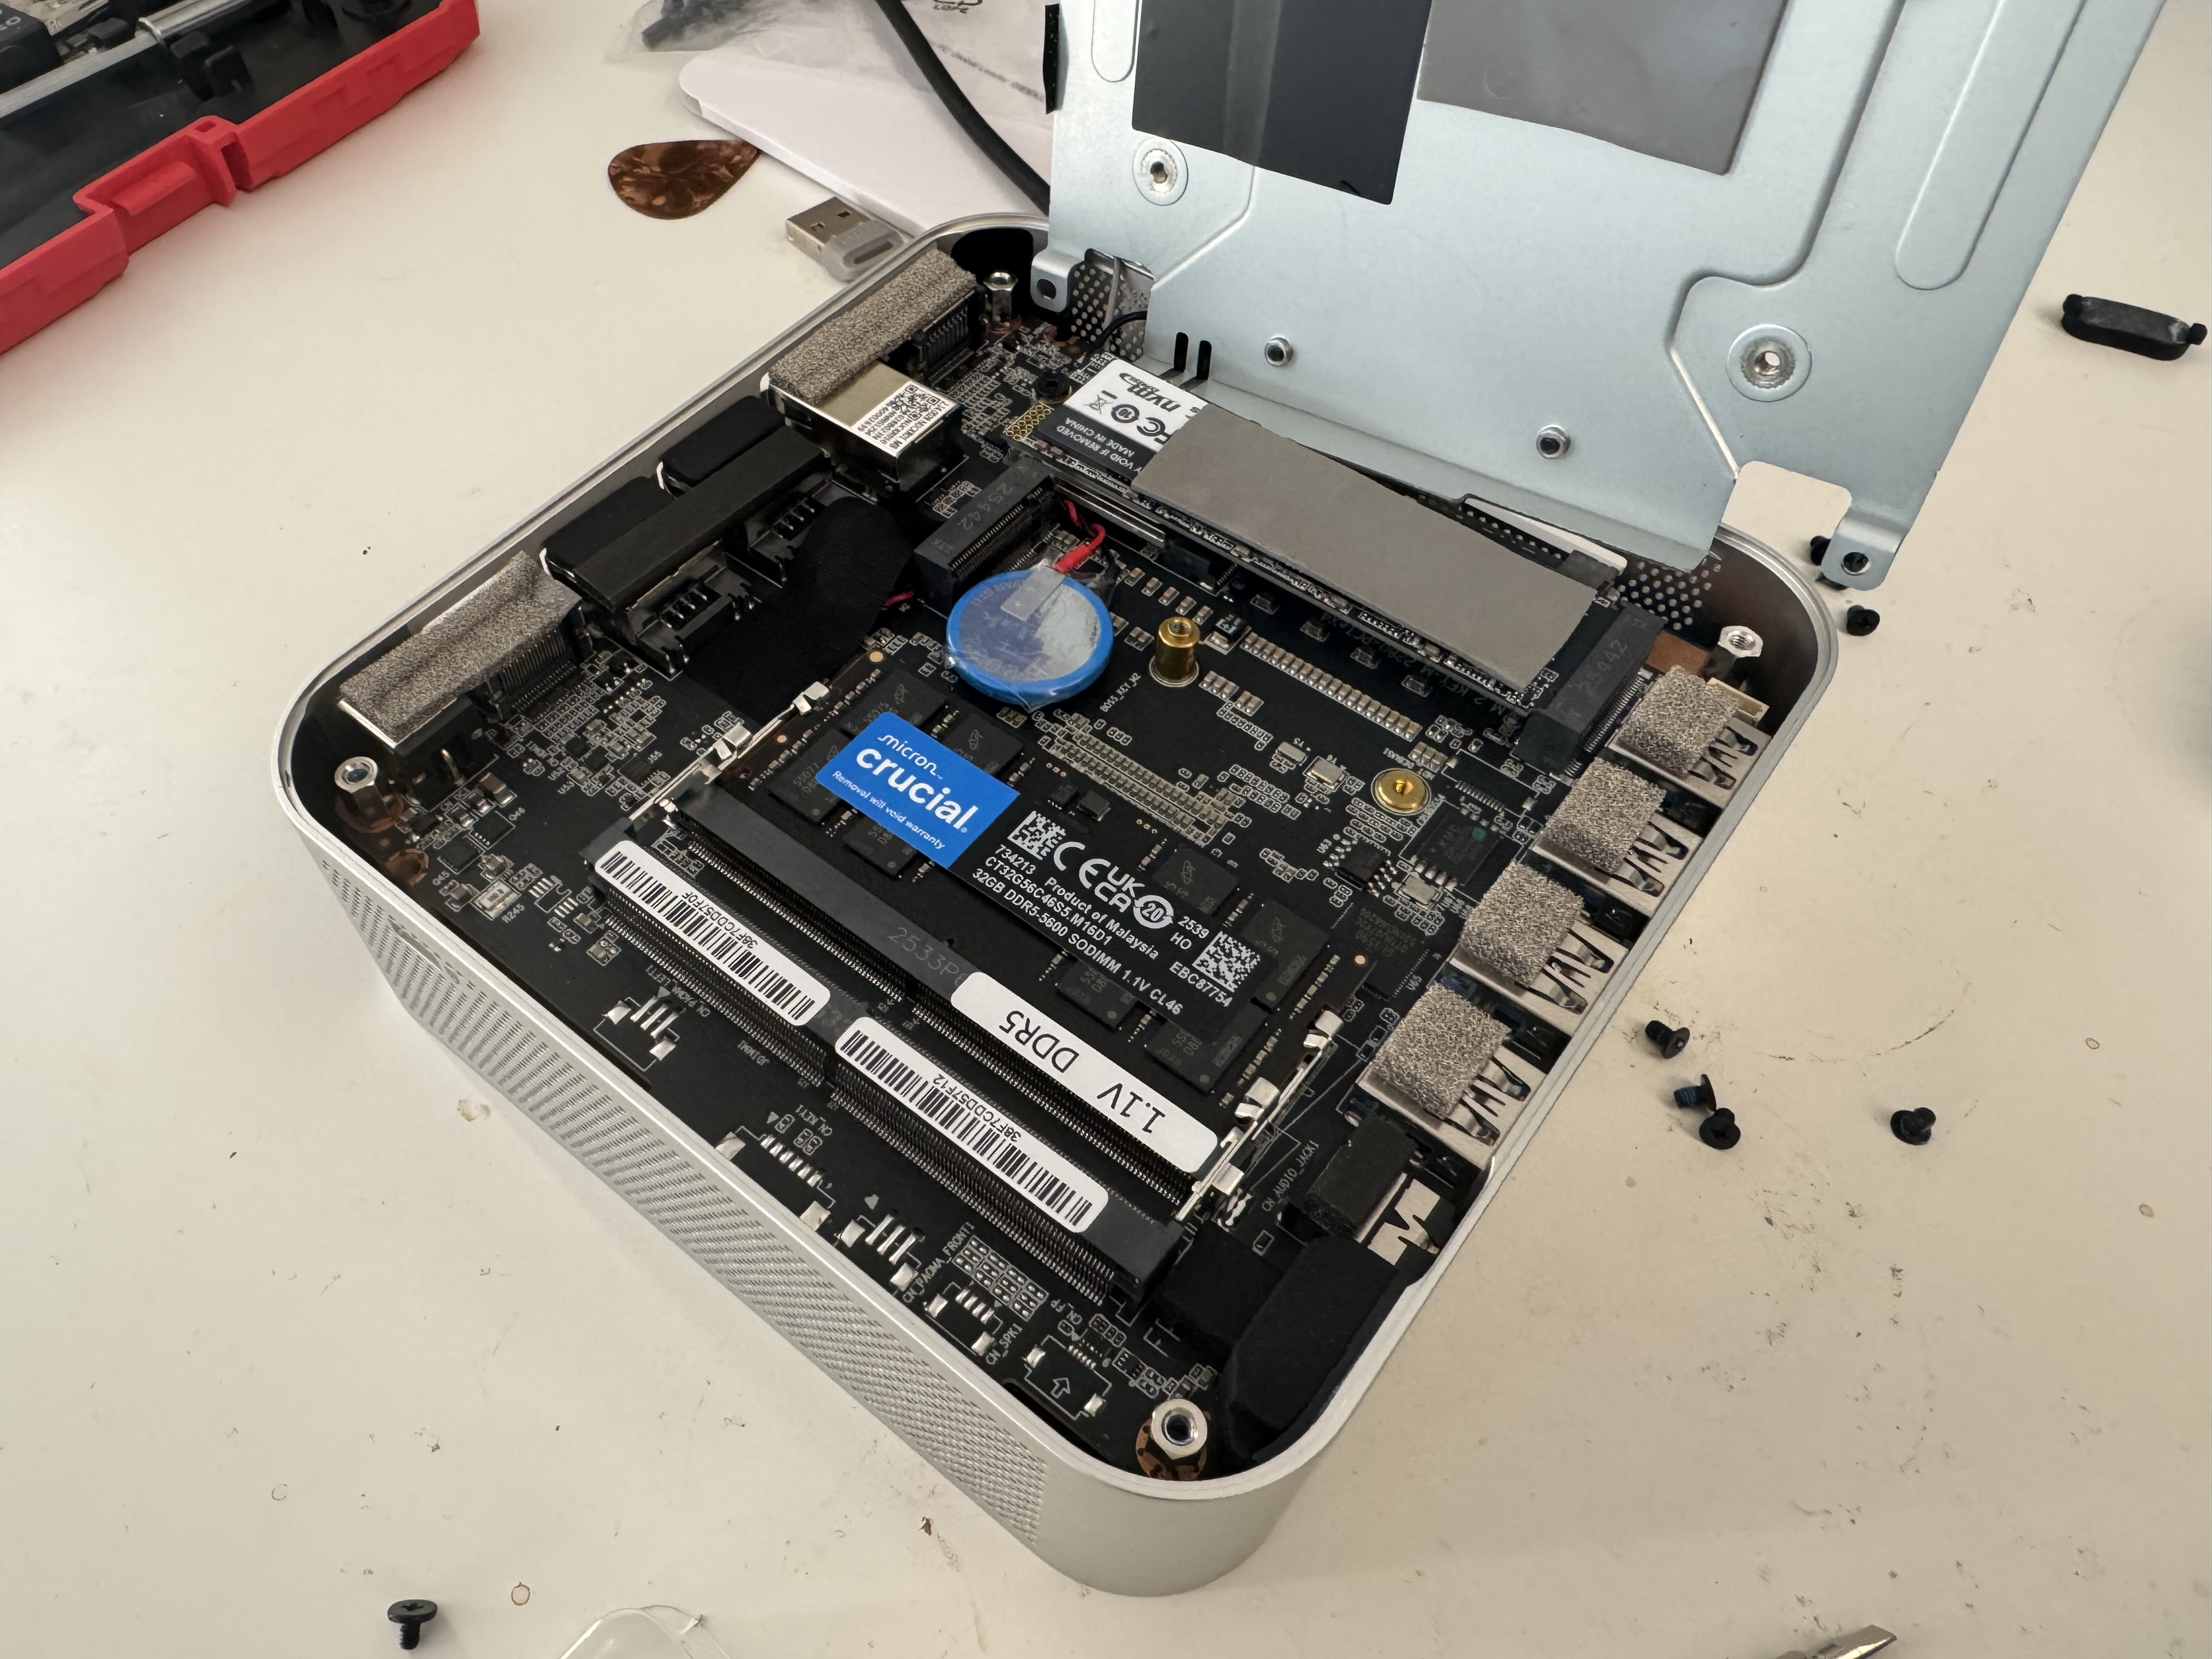
Step 2: Remove the rubber feet and unscrew the base
Flip the unit upside down. Use a plastic pry tool to lift each of the four rubber feet – they hide the chassis screws. Remove all four screws, then lift the base panel away.
Step 3: Remove the heatsink and access the board
Unlike most mini PCs, the A9 Max has a large metal heatsink beneath the base panel that you must also remove before reaching the motherboard. Unscrew its four retaining screws. The Wi-Fi antenna cables are attached to this plate. I dislodged these cables by mistake; the next post will have pictures showing how I reconnected them. Once clear, you’ll see the motherboard with both M.2 slots exposed.
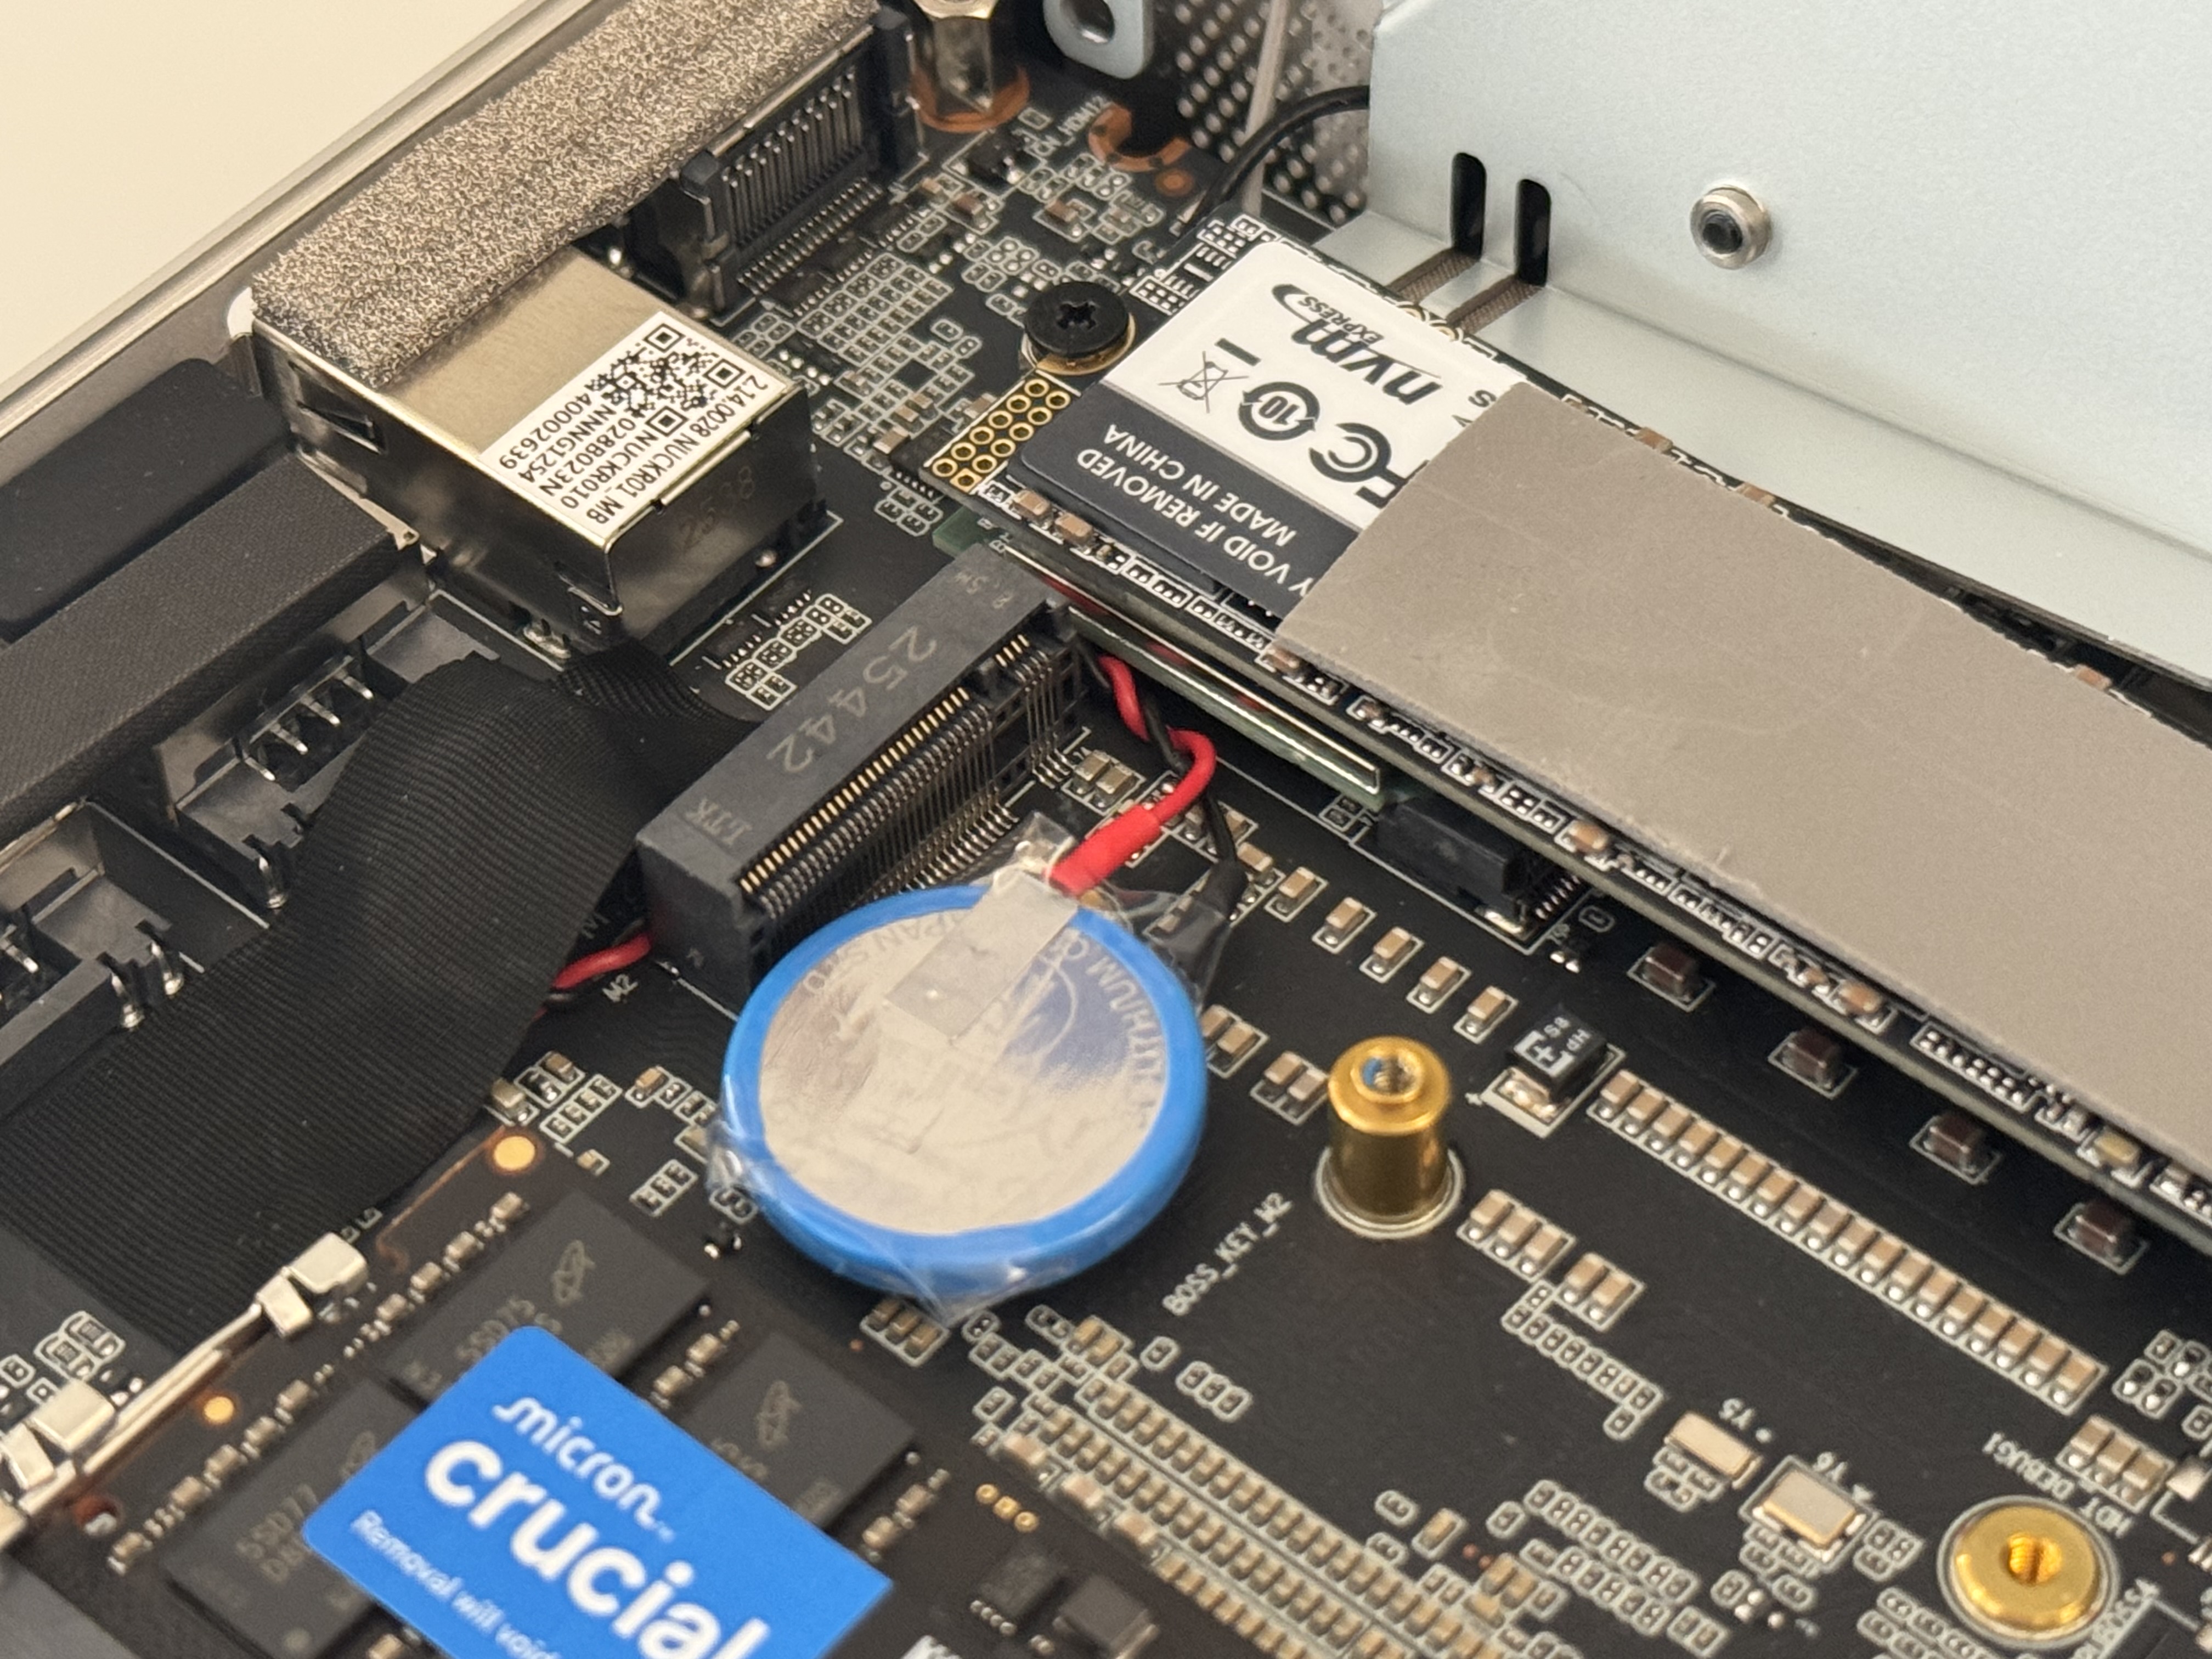
Step 4: Locate the M.2 2230 slot
Look near the top of the board. You’ll see the gold standoff screw post labelled BOSS_KEY_M2 and the short vacant connector. The primary 2280 drive (with its “VOID IF REMOVED” sticker) sits just behind it in the larger slot.
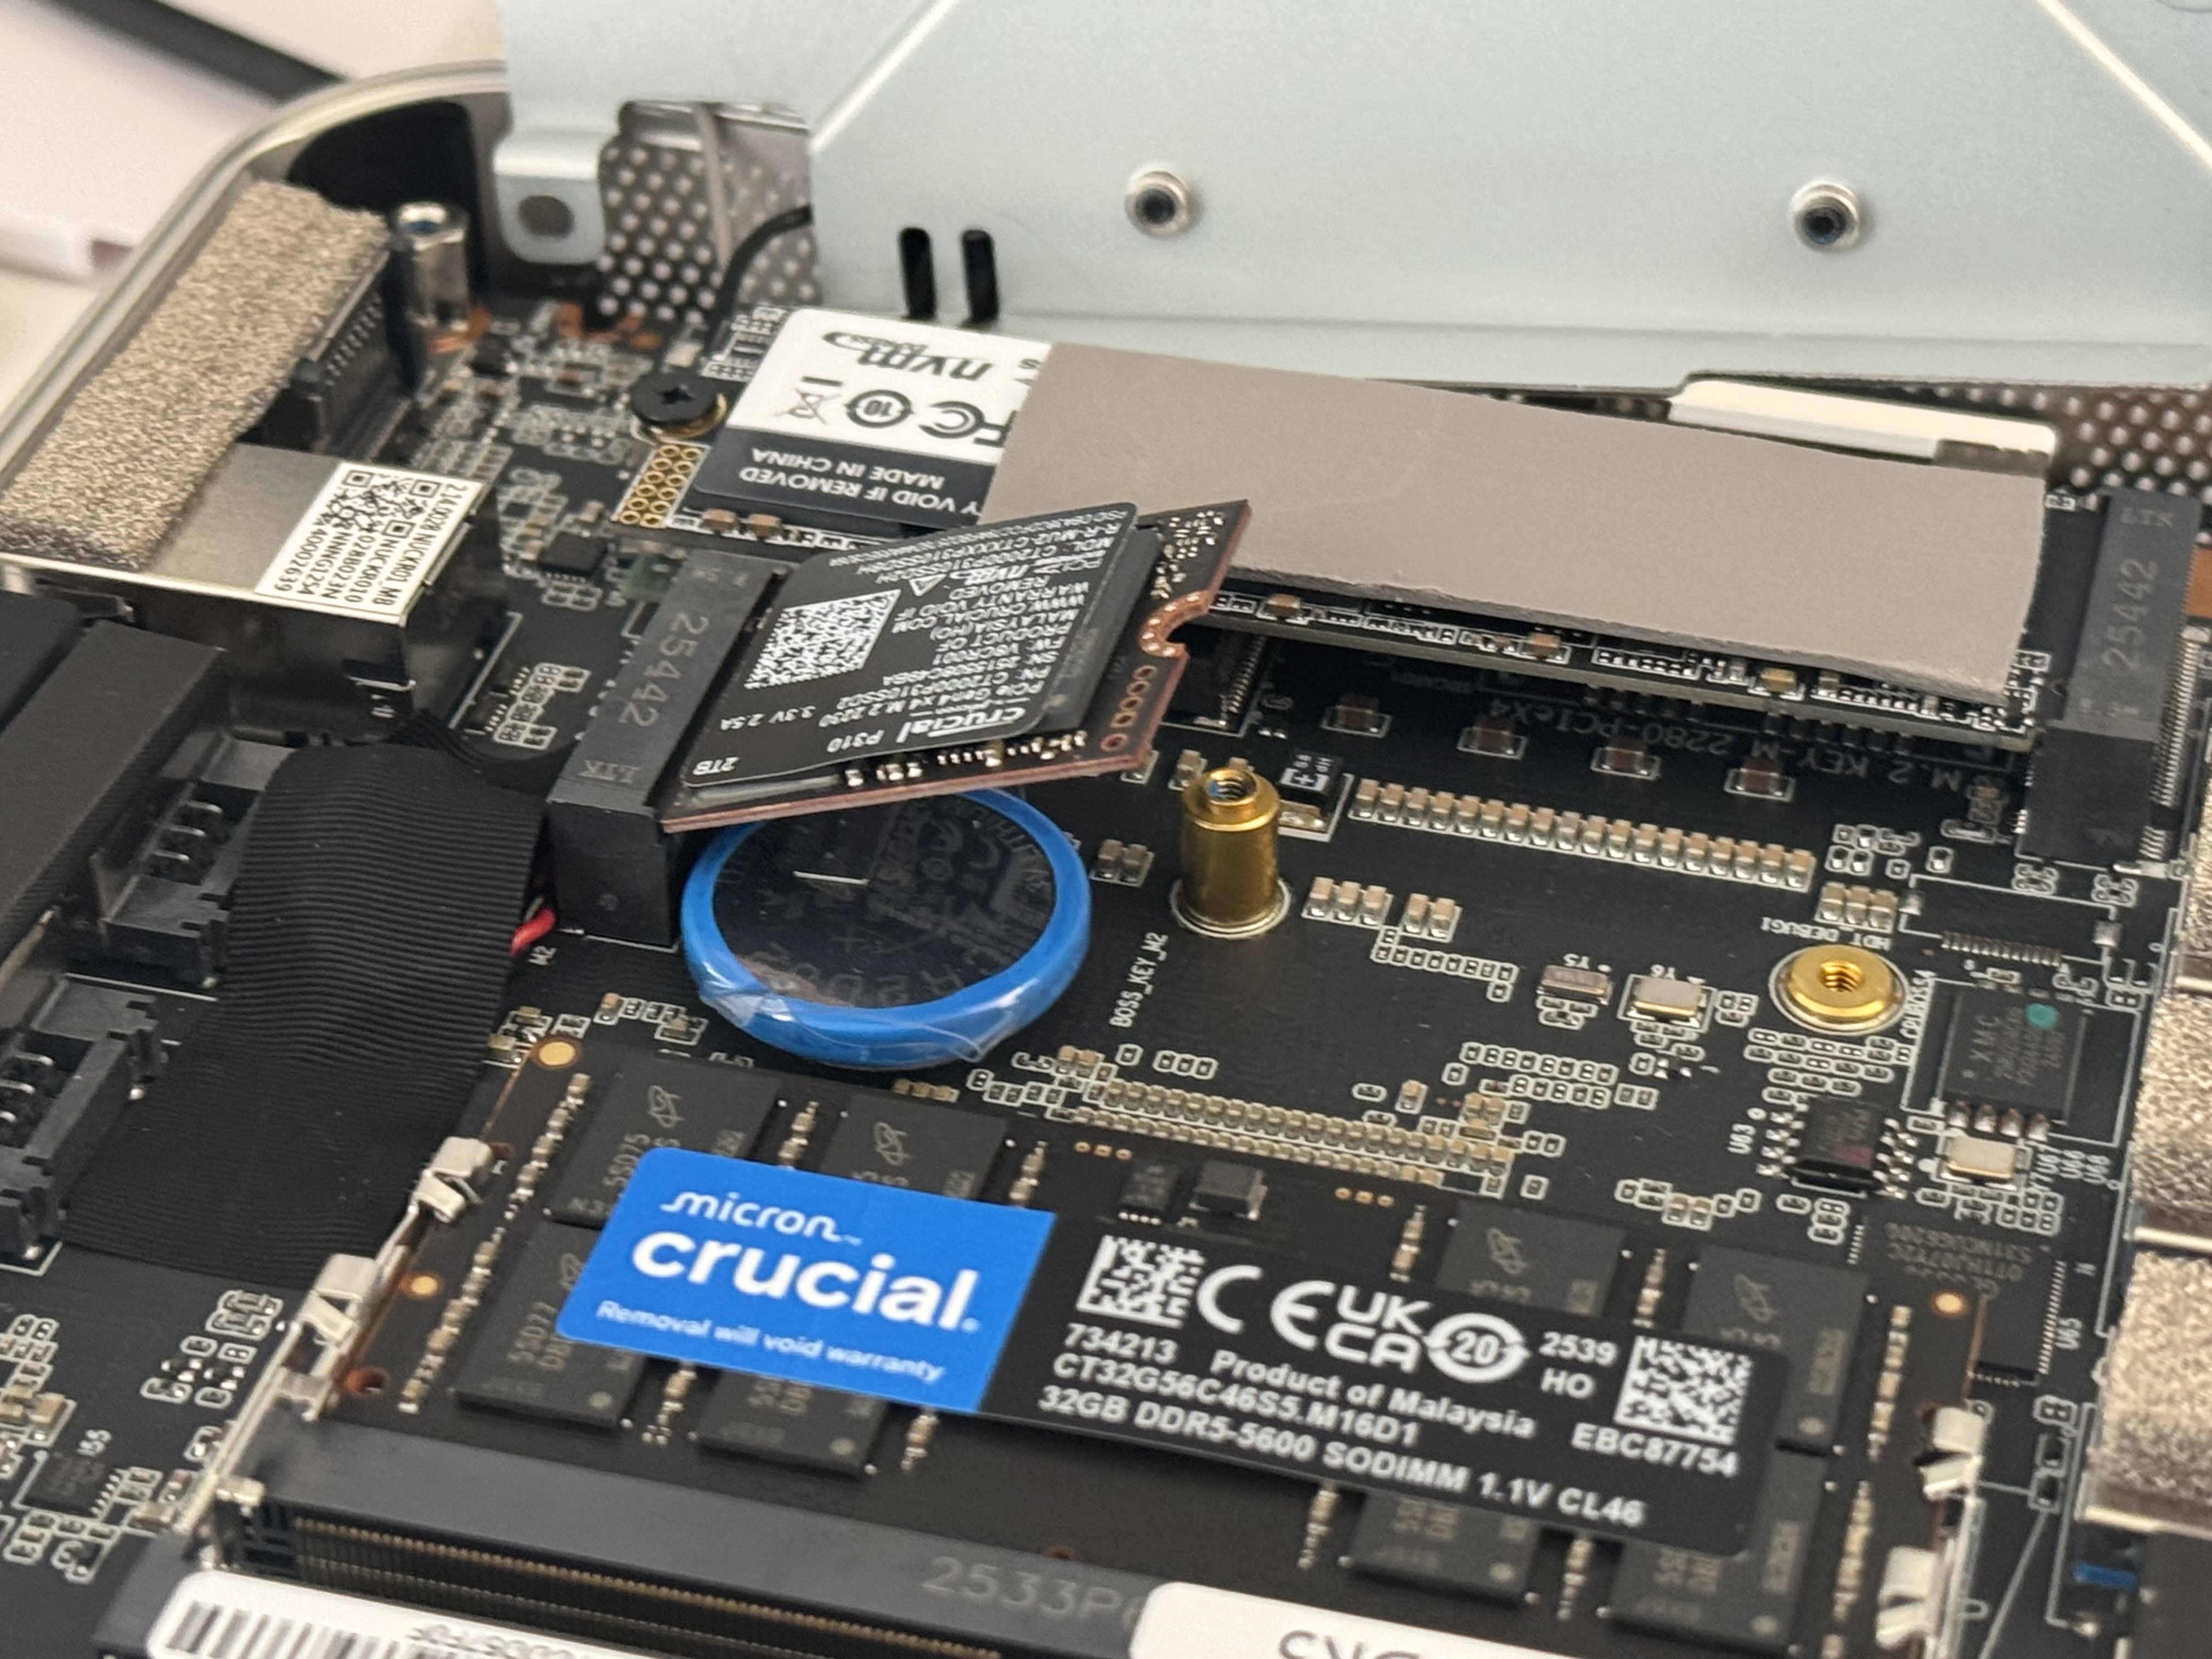
Step 5: Insert the SSD at a 45° angle
Hold the Crucial P310 at roughly 45° and slide the keyed connector end into the 2230 slot, ensuring the notch aligns. The drive is very short – it will only go in one way.
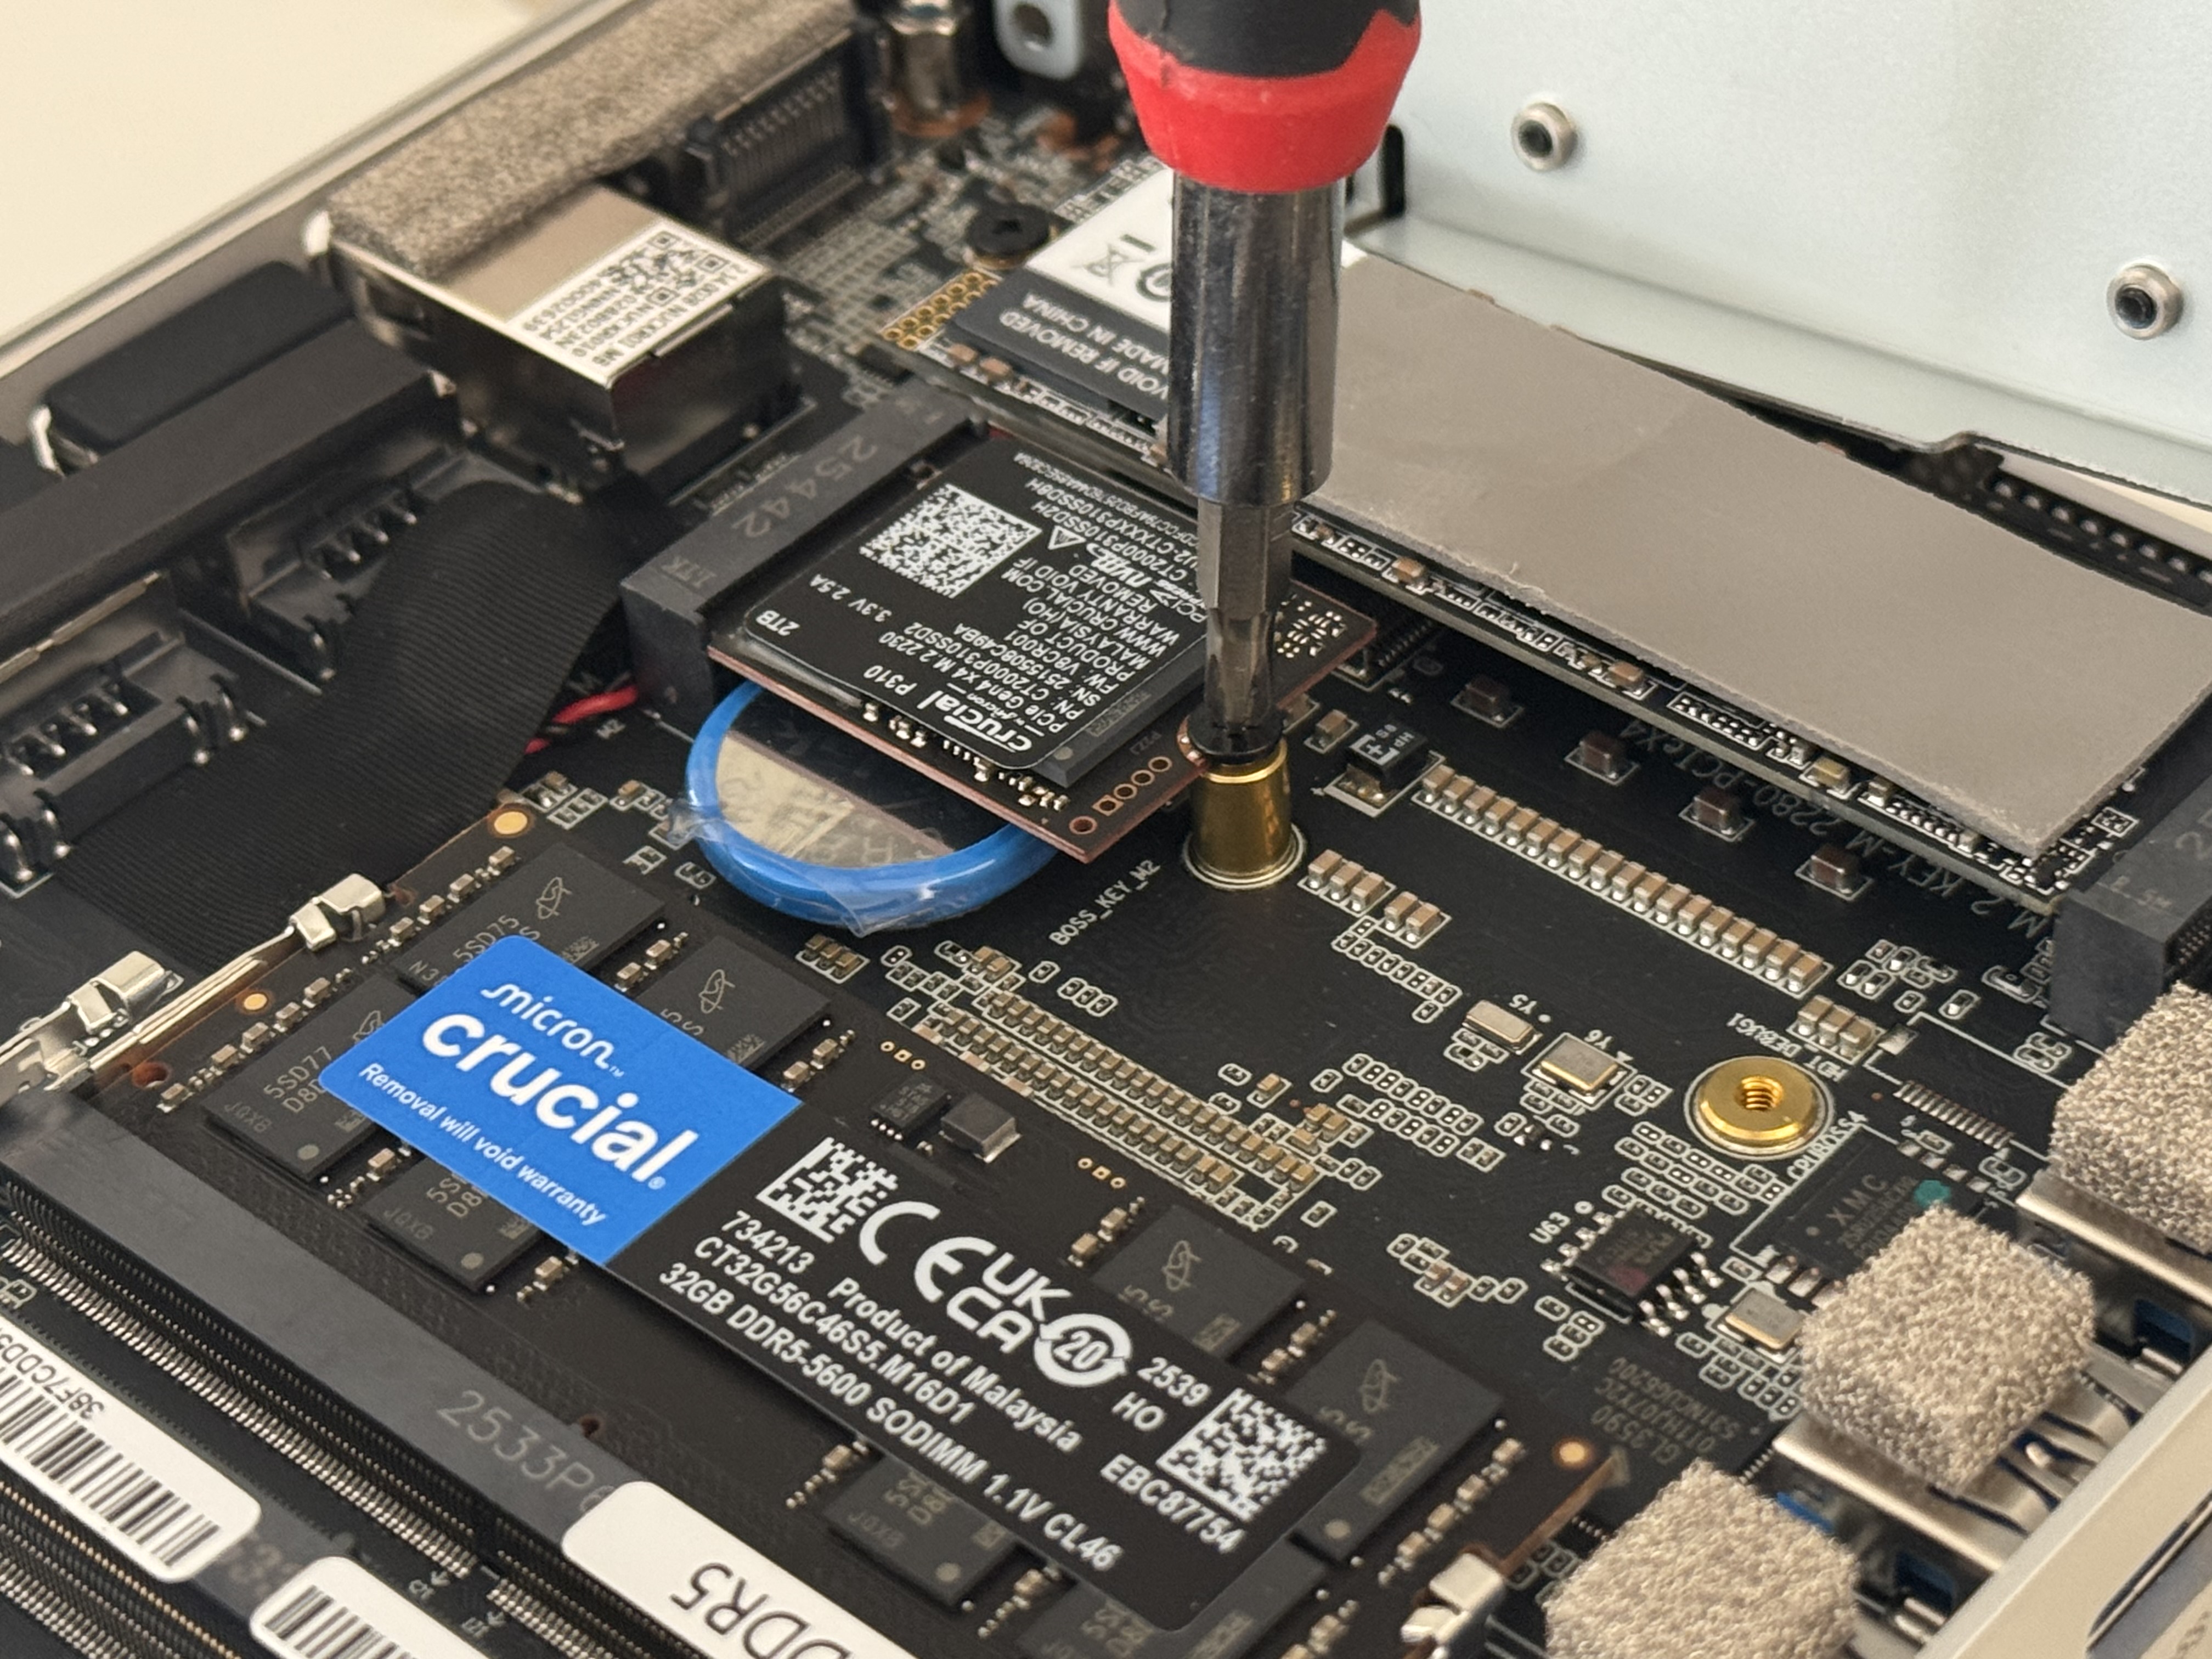
Step 6: Press flat and secure with the retaining screw
Gently press the drive flat against the board so it lies parallel. Use the small Phillips screw into the gold standoff post to secure the far end. Finger-snug plus a quarter turn is enough – don’t overtighten.
Step 7: Reassemble
Reattach the heatsink, replace the base panel, screw it down, and press the rubber feet firmly back into their slots.
Tip! If you detached the antenna cables, don’t skip reconnecting them before reassembly – your Wi-Fi and Bluetooth won’t work. Part 2 of this series covers reattachment in detail.
Setting up the new drive in Windows
See also: https://learn.microsoft.com/en-us/windows-server/storage/disk-management/initialize-new-disks
The drive won’t appear in File Explorer until you initialise and format it.
- Open Disk Management – right-click the Start button and select Disk Management. Your new drive appears as “Unknown” with unallocated space.
- Initialise the disk – right-click it and choose Initialise Disk. Select GPT for any modern UEFI system.
- Create a new volume – right-click the unallocated space, choose New Simple Volume, assign a drive letter, and format as NTFS. Done.
Tip: If the drive doesn’t appear at all, check the BIOS to confirm both M.2 slots are enabled and set to PCIe/NVMe mode. Updating AMD chipset drivers can also help.
